Saturday, February 21, 2009

A person sized cart

King Edward the Confessor giving alms to a leper in a cart. A 1517 woodcut by Hans Burgkmair (1473-1531), part of a series of images of diverse saints done for a commission by Emperor Maximilian I .

One of the points of discussion around small wagons and carts being used to haul small loads and kids around SCA events is: would it have been done in period? After many years of searching I finally came across an illustration of such a period use. So we can say that at least the concept was not totally foreign to a medieval person.
It should be noted in the woodcut that one of the conventions Burgkmair employed in his woodcuts was to make the saint being portrayed "larger than life." Therefore, the cart should be regarded as proportional to the unfortunate leper, not to the 'heroically' sized St. Edward.
The picture is found in "Bottoms Up! A Pathologist's Essays on Medicine & the Humanities," by William B. Ober, MD, page 144, fig. 6.32, ISBN 0-00-097188-6, lccn 88-45120.
McK

Friday, February 20, 2009

The Wonders of Steam


We had two days of warming weather so it was time to make hay whilst the sun shines 'cause the Nat'l Weather Service sez it wasn't to last. As I mentioned, the colder the environment the quicker your workpiece looses plasticity; and since I'm using a propane camp stove as one of the heat sources the doors and windows need to be open for ventilation.

News Flash: McKennawerks goes high-tech!

Thanks to the technical expertise of Generica, My Lady Wife, I'm beginning blogging this from the laptop down in the bowels of the McKennawerks. Gen, with the able assistance of our computer guru friend Gregor, were finally able to get the wireless router to recognize the laptops, so we can compute while sitting in front of the warm woodstove, instead of at the main computer which lives in the coldest corner of the house. Apparently wireless routers don't like dial-up, and it took some doing to convince it that, yes, while we are still stuck in the middle ages courtesy of Verizon, we really do want to use more than one computer.

I've also added a hit counter just for the heck of it. I looked at adding a guestbook as well, but after checking out some on other blogs it appears that the comments are mostly banal, off-topic, spam, or obscene. I'll just stick with google's comment widget. And of course you can email me at McKenna(one word)werksatgmaildotcom. I don't normally bring anything of a sensitive electronic nature down here due to the ever present dust and potential for (fragile and expensive) things to be accidentally knocked to the concrete floor, but we're in a holding pattern because we've started to steam.

So it's time to talk about some of the specifics of steam bending wood. It requires one hour per inch thickness of wood, plus (in this case) bringing 3 gallons of water up to a rolling boil. Fine Woodworking has a good book on many different bending techniques. If you're interested in some in-depth knowledge about how the pros do it you should check it out. I've not steam bent anything in ages and ages, I much prefer cold lamination with glue for bending to steaming. The steaming part of steam bending is easy and straight forward: where the problems arise is in the bending part.

To bend wood with steam we need:
--patience of the saints
--time
--safety equipment
--a source of steam
--wood to be bent
--a form to bend the wood over

Patience. While wood, especially green wood, is flexible to an extent, it doesn't like to bend and stay bent. Depending on many factors, especially thickness and grain of the workpiece and amount of curve, you can expect a failure rate of 50% or more. This should elicit no more than a muted, "Darn." If breaking wood is going to send you into a cat-throwing, obscenity yelling, jumping-up-and-down rage, stick with lamination.

Time. You need an hour per inch thickness of wood, and it doesn't start until a good head of steam is built up. Then you have to get the wood instantaneously into the form while maintaining a serene calm.

Safety. For safety for this project I wore high leather boots in case of a spill: I didn't want boiling water splashing my ankles and soaking into sneakers. There was a fire extinguisher close to hand, and I wore good leather gloves throughout the process in case I needed to grab something hot.

As in metal casting, though, if something starts to "go" it's usually a lot smarter to back off and let it and clean up the mess, than to risk a burn by grabbing at something. Eye protection, of course, is essential.

Steam. For the source of the steam I'm using an old turkey fryer that I actually bought with steam bending in mind. Several years ago we held an early spring outdoor event where we made a big pot of lentil soup (and roasted a pig, yummm). Since then the cooker has been sitting at the back of the shop awaiting the day I finally decided to steam bend.

For this bend I started by heating about 3 gallons of water with a hot plate, but it took a long time to get it up to a low boil, and couldn't really get it up to the rolling boil we need. So I switched to a propane camp stove. This was an improvement, but if I weren't doing a one-off project, I think I'd bite the bullet and fill up the propane tank for the gas grill and use the turkey fryer stand.

In the lid of the fryer I drilled a hole for ¾" copper pipe and just stuck it in place with friction. I still want to be able to use the fryer as a stock pot, so I didn't silver solder it in place. There was an existing hole in the lid for inserting a thermometer, which I loosely plugged with a bit of sanded down dowel. It's very important that you DON'T heat in a closed system, this plug served as a safety valve.

For the steam box I used an old piece of 4" thin wall pvc drain pipe. I cut a plywood plug for one end and drilled out a hole for the inlet pipe near the bottom edge of the plug. As water condenses from the steam in the steambox it will run back into the boiler. Again, avoiding a closed system, I left the irregularities in the edge of the plug from cutting it out with the sabre saw in place. The pipe clamp you can see around the end was due to concern that the heat might soften the plastic to where the friction fitted plug would slip out. It's just helping the pipe retain it's shape--it is not clamping the plug in place.

The piece of pipe I had lying around was too short for the 9' long poles so I extended it with flexible aluminum clothes dryer hose.

I had planned to use the dryer hose for the entire pole if it proved too curvy to fit in the pvc pipe, but after releasing them from the temporary clamping they sprang back fairly straight. If you look carefully at the plug (which is a 4" round cut from a 2x6) you'll note two holes. They are there for allowing stem to escape and the thermometer. The center hole was later drilled wider to accept a piece of 1" copper pipe used as a union for the automobile heater hose.

A test run showed the long box was too long for the amount of steam generated with the small camp stove. The thermometer only registered about 160 degrees F. at the far end.

So I supplemented the system by putting a camp coffee pot on the hot plate at the opposite end of the steam box. I stuffed an automobile heater hose scrap (left over from a wagon tire) into the spout and jammed a few small bits of cloth into the gap. As Tennessee Tuxedo used to say, "If you make do with what you've got, then you won't need what you have not."

When the pot began to boil the temperature quickly rose to 212 deg. F and more steam began to leak from the untightened lids and fittings, showing an increase in steam pressure within the box. I'm using the meat thermometer which came with the turkey fryer--waste not, want not. (I'm just full of aphorisms today)

Wood. The wood I'm using is (probably) ash. Oak, ash, and hickory are widely considered the best woods to use steam bending with. Don't bother with pine-it'll split. The thicker the piece, the longer it needs in the steambox (one hour per inch) and the more likely it is to split. The tighter or more extreme the curve the more likely it is to split. Also try to use pieces with long straight grain, it's more likely to crack where the grain 'runs out' to the edge of the wood. It's easier to stream green wood. Kiln dried wood does not steam well. If you're stuck with MegaLoweMart lumber, I'd strongly suggest considering glued up laminations.

Form. The form for bending was made from scrap lying around the shop. There is a good distance between points where the blocks push against the piece to be bent. If we were making furniture or boats where precision is a prerequisite we'd make the bending form almost continuous along the bend, but such precision isn't needed here, and would not have been bothered with by our hypothetical medieval craftsman.

To use it we need lots of clamps. Lots and lots of clamps. If you don't have them there are work arounds to clamps that I covered in an earlier post. The other thing is to make sure you do a dry run. Have all the clamps laid out to hand. Have a hammer ready to hand to help tap along the piece if necessary to overcome friction against the mold. It's really better to do one piece at a time, but since one piece was so close to the desired bends, to save clamping and drilling holes in the bending form to take clamp ends I went with doing both pieces at once.

To do this I placed small pieces of 1/4" dowel between the pieces as spacers,and used cable ties to hold them together in rough alignment. Once the boilers had built up a good head of steam they were ensconced in the steam box. Then we wait.

After a tad over an hour (the pieces are a tad over an inch thick) I pulled them from the steam box and stuffed the front ends under a cross piece and forced the back under another cross piece at that end. Then frantically began clamping. The starboard piece went in fine, but the port was a little stiff. Unfortunately, after about 20 minutes in the form there was a sudden crack! and the port piece split at the compound curve where the harness hitch would be.

This is not a total disaster, as I have plenty of wood to make another pole from, and I can cut pieces from the split pole to use in other parts of the cart.

Post mortem analysis shows that I left the split piece a little wider than the other intending to trim it down to size after bending--I should have made it the same width as the other. Secondly, when I was clamping it there was more resistance than the other so I should have aborted the clamping, let the wood cool for 24 hrs and started over. Impatience is often my besetting sin. Also, I probably shouldn't have done both at the same time. There's a lot of truth in the old saw, "if you don't have time to do it right, will you have time to do it over?"

As I said above-expect splits. I'm disappointed it didn't go perfectly, but it's not going to impact the deadline.

McK


Thursday, February 19, 2009

More pole musings

We had one warm day, so biting the bullet I went ahead with the bending. The McKennawerks is now once again uncomfortably cold. The steam bending went pretty well but it's going to be a very long post, and I'm still editing and adding things in so it will be another day before I get it done. It's late. I'm tired and heading off to bed so I'll just put this up now.

It occured to me while sitting there waiting for the poles to finish steaming that there is another argument in favor of steam bending the poles.

In period illustrations of both wheelbarrows and plows you can see arching handles or shafts. Some of these are apparently cut to curves from wider boards, but some appear either steam bent or cut from tree stock of the correct curve. Thus, we can reasonably infer that curved and compound curved pieces of farm equipment would be recognizable to our period craftsman, and considered as a solution to minimizing the weight of the cart without enlarging the wheels.

Here's a few illuminations to illustrate my point.


The wheelbarrow is from the Lutrell Psalter, the same book which has the illumination we are using as our inspiration piece. The two plows below are from later in period books of hours. The bottom plow picture also shows a double tree and swingle tree. We will be using a swingle tree in this cart, as on the one covered earlier.

McK

Tuesday, February 17, 2009

Building up a head of steam

I just discovered that while you get the nifty little "pointy-link-finger" as you mouse over the pictures here at McKennawerks, it seems that double-clicking doesn't always open a larger view of the picture. I have no idea why not. Until I can it figure out and fix it, if you can't make out a detail you need in a picture, drop me an email and I'll send you the larger version.

We're getting ready to move on to steam, but that may be delayed a few days. It's gotten cold again, and I'm not sanguine about how successful I'd be in a frigid shop. Wood is bent with steaming by heat and moisture making plastic the hemicelluloses in the wood fibers. As soon as you remove the piece from the steam box is instantly begins to lose malleability as a function of cooling. Since these are long pieces, requiring many clamps, and shaping into a complex compound curve, I'm concerned that in a cold shop I won't have adequate working time to bend the poles without cracking.

I've made some test pieces and we'll give those a shot first.

(Later on...)

Man, I'm tickled pink! I got so pleased with the way the poles are turning out I had to drag Gen down to the McKennawerks in her jammies just so I could share with somebody. I thought the shop was still too cold for steaming, but I went ahead and built, scratch that, cobbled together, the bending jig. As you can see from the below pictures, the first pole I cut is nearly perfect just cold clamped in the jig, and the second pole is very nearly there, too.

Of course, at this point the wood is still green and springy, and as soon as I pull the clamps off it springs back too far to be useful. But this means that when I steam them they should conform to the blocking fairly easily. I didn't pull the left pole all the way into the block for fear of over-stressing and cracking it, but I was able to get this much conformity from both of them without and sign of cracking at all.
I think this strengthens the argument that bent poles are a possibility. It shows that with careful selection of the trees to be cut steam bending would not have been required, in that I feel strongly that I could clamp both poles to the blocking and let them dry in place for 6 months or so and they would be satisfactory.
However, I have a deadline, so steaming it must be.
BTW those of you thinking of building a dog-cart who want to skip steaming could produce the same effect with glued laminations, though it's not a period practice.

Here is a close-up of the end of the right-hand pole. You can see that the blocking for the jig is built up of odds and ends of scrap. The "C" clamp is hooked on the bottom to a super heavy duty clothes rod mount. I pulled a bunch of them out of the MBR closet 7 years ago when working on remolding the MBR--never throw anything away, that's what I always say (Gen always says, "Whatinthehell are you going to do with that old thing!).

mck

Monday, February 16, 2009

Starting to get shafted

Back to conjecturing...

As previously noted we're faced with drawing conclusions from period iconography of horse carts to design our dog-cart. The Lutrell Psalter has several representations of wagons, but all of them have straight shafts. Should we not use straight shafts as well?

There are what I believe are several logical reasons not to.

First, let's be honest, the curved shafts are more aesthetically pleasing, and if I'm going to all this work I want something that looks cool. What can I say.

Second, in line with the conceit that this cart would have been built at an on-site workshop of a monastery or latifundia it's not unreasonable to assume bent poles. If we are to keep the bed level, and not spill our goods on the ground we cannot use straight shafts. They would require larger wheels, with a consequent increase in weight. Remember, we're not looking at a cart to be pulled by a heavy draft horse or ox, but by a dog. The load is limited. Every ounce more in cart weight is an ounce less of potential useful load. The cart would be made as light as possible to make the load as great as possible.

Third, the craftsmen of such an estate would have had ready access to coppice. It took me only a few minutes walking around to find two suitable poles. For my full-size Djebjerg Wagon project I have several pieces of very complex curved natural growth seasoning. It took me about an hour wandering through the woods to find the two trees I used. If it's this easy in 21st century mid-America to find suitably curved standing wood, how much easier must it have been in a more heavily forested and coppiced medieval Europe. Additionally, our hypothetical craftsman would not have been under a deadline--he could have bent trees and allowed them to grow to shape as was done for boat building.

So I think it's not inconceivable our craftsman would have elected to use smaller, sturdier, lighter wheels, and use poles that curved to a useful height and distance.

Unfortunately, finding perfect poles is not as easy as finding fairly good ones. To get what we need is going to require more than careful shaping with the drawknife. Thus we'll need to steam bend the poles to get the desired compound curves. We know that steam bending was done in period by furniture makers and boat builders so the technique is appropriate. And I don't think it's stretching our conjecture too far to posit that our craftsman would have used it rather than spend large amounts of time searching for just the two perfect pieces of wood.

Today I cut the second pole and shaped it as with the first one. Since it didn't match exactly with the old one we'll correct the differences with steam.

Right now the two poles are clamped together hand bent to roughly the intended shape. This is as much as could be achieved with hand pressure, clamps, and carving. The back end is clamped flat to the table and some curvature induced with blocks and weights. The tips of the poles are about eight inches higher than the back ends. We can fiddle with the axletree some, but this puts our axle about 11" - 12" high and the poles about 19" high, a good hieght for a drafting dog.

Clamping like this helps the wood develop a "set" while it dries awaiting bending. They will stay clamped like this while the clamping jig is constructed and the steam box is assembled from an old turkey fryer and some pvc and copper pipe.


Tomorrow we steam!

mck

Sunday, February 15, 2009

OK, this really is me, down in the McKennawerks planing one of the poles for the dog cart. And yes, I really do dress like that in the shop when I'm working on period items (and wear the hat most of the rest of the time as well). The shirt is fustian..."as per Angus MacBride's illustrations in the Osprey Elites' on The English Civil War, gussetted in the neck and underarm, with 4" falling band collar and wood buttons." I picked up at Pennsic from Sykes Sutlery. I'm trying to get it that 'lived in-worked in' look. The hat was purchased from Mistress Nicola de Bracton at an "SCA garage sale."


So I went out this afternoon (weaseled out of sheetrock taping--I hate taping sheetrock) and cut a small tree to experiment with for the poles. It was dying anyway, because late last summer the electric co. sprayed herbicide on it and several others. Ticked me off, bigtime. While they weren't on my lot, they were on common land next to it, and they were both waaay too short, and at the edge of the RoW, to ever threaten the power lines. Also it was covered with honeysuckle, which was also murdered. I admit honeysuckle is a weed and rank growing, but the flowers were pretty, and I like the way they smell. I hate Buckeye Rural Electric Co-op. Bastards.


Anyway, the clump of trees is dying and unsightly, so down they'll come--may as well serve a better cause than firewood. They're not oaks, though. I'm guessing from the bark and wood grain/color they're ash, which is common around here. I never really paid attention to their leaves, just regarded them as oversize trellis for the honeysuckle. This will work out well for the poles. I hauled it down to the shop and cut a length about nine feet long and a tad over 3" dia. at the base. The wider piece left over from the base will be a practice run for spokes, though I'm still planning on oak for those.


I started off by removing the bark which peeled off easily in long strips (a clue to its being ash). Then I set it in the B&D workmate. Most of the time the workmate is a catchall for odds and ends, but for working long stock, especially irregular stock, it's the bee's knees (Do bees even have knees? If so, why are they considered so exemplary?).


I then used the drawknife to flatten one side of the pole.


Let's talk about drawknives for a minute.


A good, sharp drawknife is a joy to use. However, a good drawknife is hard to find. There are plenty of cheap, crappy knockoffs from overseas, but one made with good quality steel is neither cheap nor easy to find. If you're a frequenter of flea markets keep your eyes peeled for old ones, which can sometimes be had cheap. This one was an xmas gift from my in-laws, and was not a flea market find--I hate to think what they must have paid for it, bless 'em. It's perfectly balanced, holds an edge like a dream, and the handles are (as Goldilocks would say) juuuust right.


But you have to be careful with them. My brother was using one once and he slipped: now he's my half brother! Ba-dum-bum. OK, that's an old Roy Underhill joke presented here as an homage.


The drawknife is the perfect tool for beginning the shaping on a piece of tree. Planes and jointers are great once you've shaved a side flat, but nothin' beats a drawknife, a good eye, and a steady hand for this part of the job.


Once a narrow flat surface was obtained running the length of the piece I drove a small finish nail in the center of the growth rings at each end and stretched a string between them. The pole isn't straight, so I'm using the natural curves of the piece to make it easier when I steam bend it to final shape. I marked a line with a sharpie along the length so I can judge where to plane off more wood.


Here you can see the line at the wide end of the pole. Metal calipers are massively useful for shaving wood to the right dimension. I set the jaws to about 1/2 the desired width at the base, and marked down the pole to either side of the centerline. Some places I needed to do a lot of shaving, others not so much.


Once one side was as close to what I wanted as drawing and planing would get it (allowing for the anticipated shrinkage, of course) I ran the pole through the jointer/planer to make the sides parallel. I then ran one of the perpendicular sides across the jointer to get a reference perpendicular edge. The pole is intended to be about 1 1/8" thick and 2.5" wide for about the first 3 feet where the bed will be, then taper to about 7/8" or 3/4" x 1" at the other end.


At this point I have one pole rough cut and ready for steam bending. Here you can see the natural bend at the front end of the pole compared to a straight edge. I'm going to exaggerate this bend when I steam it.

Tomorrow I'll get the other pole set up and make the jig for clamping the poles to shape after bending, and put together a steaming box.

This is a very rough idea of the final shape I'm shooting for.

mck

Well, yesterday sucked....

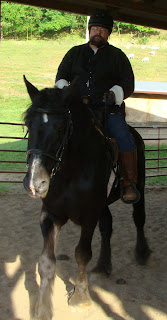
In the cold, dismal morning the new owners of my Frisian/Percheron gelding, Oberon, came out to the stables to pick him up. I've had to face the fact that I've buggered up my back so badly over the years that horseback riding has had to move into the category of 'used-to-do.' Though he's had draft training, I haven't: and it's a big and time consuming skill set to develop. Even if I had someone to teach me around here, I probably couldn't manage it, and trying to teach yourself something involving 1800 easily startled and fast pounds of "I'd really rather be back in the barn eating hay, thanks just the same" is definitely not smart.


So though I haven't been able to do much with him in the past few months; and logically, paying feed, vet, farrier, and stable fees for a pasture ornament--no matter how pretty--just isn't in the cards, it's still a wrench to say goodbye. He's going to a good home where he'll be spoiled rotten and played with regularly, which is important to me, but still...


When I got back home I figured I'd get to work on the spokes for the dog-cart wheels... nothing like makin' sawdust to cheer a fellow up. I decided the wheel diameter should be about two feet. Why? Jest seemed right--it's one of those aesthetic things. Thus the spokes ought to be 9" between hub and felloes, which gives a wheel diameter of 9"+ 9" + 4" + 1.5" + 1.5" = 26" ( spoke length + spoke length + hub diameter + felloe thickness + felloe thickness ). Allowing for shrinkage, and tenons into the hub and wheel, meant I needed to cut and split enough oak billets to get 16 spokes (12 spokes plus 4 spares for when I screw up the tenons, count on it folks, screwing up at least one tenon is a given) each blank about 13" long. The length of oak I had that came down in the storm should have given me enough billets, to quarter by splitting, 20 blanks, though I figured that I'd probably only get two quarter sawn blanks from some of them due to grain run out, knots, twist, etc..


No such luck. After cutting the trunk off the stump in the cold and drizzle (the whole day it only rained while I was outside cutting, sheesh) I hauled the log down to the shop and cut 5 billets. Then I grabbed a wedge and sledge hammer and went to work splitting. I was unhappily surprised that the healthy appearing oak (it only came down because a much larger white pine further up the hillside fell over directly on it) was infested through the center with wood boring beetles.


S%*T!!!


I now have some split oak for the firewood pile and a growing concern about some big oaks near the house. Said wood pile btw being freshly delivered after the last storm when we were beginning to run low, is made up of some nice oak that I spent an afternoon cutting into smaller lengths to fit in our small woodstove, all of which are therefore now too short to use to make spokes.


S%*T!!!


However, I'm led to rethink splitting the spokes from billets. In discussion with a wheelwright many years back (eight and eleven twelfths, to be precise--it was on my honeymoon) who makes reproduction wagon wheels the old fashioned way as a docent in a living history museum, he mentioned that sometimes spokes were shaved down from saplings, rather than being carved from billets, in wheels intended for light use vehicles, like fer instance, dog carts.


Don't get excited--the dog carts he meant were very light, 19th century, horse drawn carts with a high seat over boxes/cages used to haul hunting dogs to the fox hunts. The thing is, I have a surplus of small oaks (less than 4" diameter). It might prove more economical of time and resources to use some of these saplings, which would also be good forestry as many of them are growing too close together and to more mature trees.


It would also make logical the construction of a springpole lathe. A drawback is, since I never bought a lathe also I never bought gouges and chisels appropriate for wood turning. IIRC Roy Underhill (a personal hero) did a show where he made a springpole lathe and the first thing he did was turn handles for gouges and make more gouges.


So it's entirely possible I may decide tonight to cut a few saplings and shave/lathe the spokes. The more I think about it the better I like the idea. For one thing, it would let me use lengths of the trees I'm going to have to cut anyway to make the poles.


I've also started working on the molds to cast pewter buckles and fittings for the harness. A dog-cart pulling harness looks just like a bridle for a horse, so I can use examples from a book on period horse tack fittings found in London--and hey, bridles I know!


So now it's off to help my Lady Wife tape sheetrock for a while...


mck

Friday, February 13, 2009

back in the saddle again

This is me down in the McKennawerks (just kidding, I have a beard, but I really do wear a period hat like that)

Ok, the wagon building has suffered from:

1) shop waaaay to cold to work comfortably--long sleeves and power tools are not an auspicious combination.
2) every horizontal surface in the shop buried under wood and widgets.
3) sprained left elbow loading firewood.

But we've had some spring-like weather, so I was able to bring a little order to the McKennawerks, and it's time to get some work done. I'm putting the finishing touches on some wheels for the "buckboard" style wagon (the bed parts are still buried). Eventually (hopefully soon) I'll get some pics and description up. But I've gotten sidetracked.

A sidetrack with a deadline.

As I said, at some point I'll come back to the wagon, but right now I'm into building a period dog cart for an A&S entry. Since I have to do a buncha documentation for the entry, what could be better than to blog that? Why a dog cart when I don't own a dog? Funny you should ask... I'm once again attempting a Pentathlon, and the only logical entry I have for one of the divisions is in the category of "Animal Accessories." I figure this ought to be a pretty over the top "accessory."

First some commentary. This is an advanced project, and I'll be using some tools you likely won't have, I'll mention some alternative methods, and I'll be showing an alternative to a lathe for 'turning' the wheel hubs. And we'll also be (probably, possibly, maybe...) be making a spring-pole lathe at some point. And once again the plans will come last, as this is pretty much a 'figure it out as you go along' project.

When it comes to period dog carts we don't have a lot of information available. There are some period sources that mention using dogs as pack animals and mention dog carts, but I've only been able to discover one period illustration of a dog cart. It is reportedly in the 14th century illuminated manuscript called the Smithfield Decretals. It is on folio 110 verso of British Library Manuscript: Royal 10 e IV. Apparently this is no longer available on-line, but I have requested a copy from the British Library Image Search, and hopefully I'll have one early next week. And as I've mentioned before, we have very little in the way of extant cart or wagon parts from within our period (600 to 1600 ce). Thus we are left with the need to make logical conjectures.

So let's conjecture: First, most of the construction will be in "green" (recently cut) wood.

For several reasons. The first is that the wind and ice storms we had recently took down several trees near the house, so I'll be making use of a readily available material. Second, in period, most wood working was done with green wood until late in period. Green wood works easier. Using seasoned hardwood was a late period development--when tool steel that would keep an edge longer was more readily available. Thirdly, as the green wood dries out and shrinks it naturally makes the joints tighter. This is a definite advantage for the spokes and hub mortise and tenons.

Forth relates to the nature of the cart itself. Who would use a dog cart? Someone with a dog. What would they use it for? Hauling moderate loads within a walking distance of their home. It seems to me unlikely that a dog cart would have been an ornate capitol investment of a wealthy landowner or noble. More likely it would be simple equipment found at a monastery or large farm, and chosen as less of a capitol investment than a large horse/ox cart or wagon.

Though "Of Englishe Dogges" (1576 ce) mentions that the "Tinker Cur" was used by traveling tinkers to transport tools (and presumably goods and personal items) I think an itinerant use of a dog cart less likely, as the dog needs to be fed, and on the road this presents an expense/ difficulty that would exceed the transport value of the dog cart.

So for our purposes we'll assume a monastery dog and cart.Since the iconography of dog carts is limited, it is logical to extrapolate from images of hand carts and horse or pony carts of the period. http://www.imagesonline.bl.uk/results.asp?image=021983 shows an image of a farm cart driven by a monkey from the Lutrell Psalter (circa 1325-1335 ce). If we look at this picture we see a two wheeled ladder bed cart with wattle (basket weave) sides. This will serve as our inspiration piece.

I think it reasonable to assume our cart would be lightly built, and have a frame of green wood, joined with lap or dovetail joints and secured with trenails, and a wattle bed and sides. The harness would be of leather, with cast brass or pewter fittings. The value of iron would limit its use to where a suitable substitute is not readily available. Thus only the wheel hub stock rings and axle pins would be iron.


We're going to begin with the wheel hubs. These are in red oak. An oak of suitable dimensions was brought down by a larger pine during a storm last week.


Step one is to cut a billet of (hopefully) knot free straight trunk at least one foot above the roots, which will provide a nice even straight grain.

To digress. I don't own a lathe. Weirdly enough despite all the other tools I've picked up over the years I've never gotten around to buying one. So what we're going to do is make a hub fiddle--a jig (OK, technically a fixture holds a workpiece and a jig holds a tool, we'll stick with the linguistic barbarism of calling them jigs) a jig to hold the billet centered while we use other tools to shape it. If you look at the picture you'll see it's basically two support pieces with pins clamped to a workbench.


Across the top is a slotted board to support the tools over the top dead center of the billet.
I used a roto zip with the routing attachment with a 3/8 straight cutting router bit to shave the rough billet into a cylinder 12 1/2" long and XX inch in diameter.
I also experimented with using a dremel with a 1/4" routing bit in a jig. The dremel is mounted in part of a circle cutting jig which is attached to a simple sled to let it slide along the work bench top. This worked, and if I didn't have the rotozip I would have stuck with it but it was too darn slow.


I then marked up the cylinder with reference marks to make two hubs. The hubs will be separated after the coves are cut. I'll do this on the miter saw so that I get nice square cuts.


In order to turn the coves I used a trick usually done on the table saw, but here carefully done with a circular saw. The saw is set so that the blade is slowly lowered at a slight angle to the centerline of the cylinder into the workpiece which is turned by hand and the angled blade carves out an ellipsoidal cove.


Here you can see two guide blocks screwed to the top of the jig to accurately position the saw.


This is the cylinder marked for cutting into two hubs on the miter saw.

After cutting the hub blanks the ends are sealed with paraffin to prevent them from drying out too fast and checking (cracking). I also recommend storing them in the fridge until you're done working them to slow the drying process.
I then drilled them with 1 1/8" holes. To do this the centers are marked with a center finding gauge and drilled in each end with forstner bit on the drill press to create a hole trough the hub for the axle.

I then made another smaller (shorter) hub fiddle and mounted a hub on a 1 1/8" poplar dowel so that it would rotate freely and slide from side to side in the jig.
A word about dowels... just because the label on your dowel says 1 1/8" don't expect that it will be accurate, you made need to sand the dowel smaller or the hole larger. The dowel mounting is temporary, remove it as soon as you're done working on the hub, or the hub will shrink--locking it so securely in place you'll have to drill it out.
I mounted it to the hollow chisel mortiser. I stepped off six equal divisions with a pair of dividers then cut 1/2" x 1.5" mortises into the hubs. The sides of the mortises are parallel. Only in very heavy wagons with large wheels is it necessary to taper the sides of the mortise. In the case of these light duty dog-cart wheels the spokes will rest on shoulders above the tenons. But we do need to cut the tenons very tight because they are held in by tension only: no glue.


Here the mortises are being carefully cut with the mortiser. The tape on the chisle shows when I've cut deep enough (about 1.5"). Cutting into oak is hard and there's no need to overdo it.

After that it's off to the drum sander to clean them up a little. Tomorrow we'll dress up mortises and cut the spokes from more of the red oak. I'll also take some more detailed pics of the jigs.

mck